")


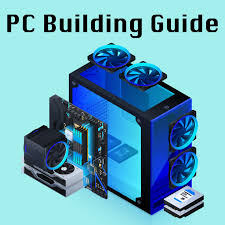
Ultimate Gaming PC Build Guide (2025): How to Build the Best Gaming Rig for Any Budget
Gaming PC Build Guide is one of the most rewarding ways to maximize performance, customize your setup, and save money compared to pre-built machines. Whether you’re targeting high-FPS esports performance or a 4K ultra-settings monster, this Gaming PC Build Guide will walk you through every step—choosing components, compatibility tips, assembly steps, and optimization.
Why Build Your Own Gaming PC?
1. Better Performance for Your Money
Custom PCs let you choose the exact components you need, ensuring maximum gaming power without paying for unnecessary extras. Visit
2. Full Upgrade Control
Swap the GPU, add RAM, or upgrade storage whenever you want—no proprietary restrictions.
3. Better Cooling & Aesthetics
From RGB lighting to custom fans and liquid cooling, you can make your rig look and perform exactly how you want.
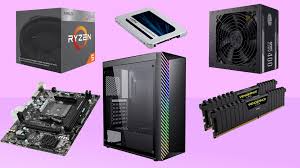
Essential Components for a Gaming PC Build
Here’s the full list of parts you need when building a gaming computer:
1. CPU (Processor)
Your CPU handles physics, AI, and overall system performance.
-
Best for Budget Builds: AMD Ryzen 5 / Intel Core i5
-
Best for High-End Builds: Ryzen 7/9, Intel Core i7/i9
2. GPU (Graphics Card)
The GPU is the most important part for gaming.
-
1080p Gaming: RTX 4060 / RX 7600
-
1440p High FPS: RTX 4070 Super / RX 7800 XT
-
4K Ultra: RTX 4080 Super / 4090
3. Motherboard
Choose a board compatible with your CPU’s socket.
-
Key features: PCIe 4.0/5.0, M.2 slots, VRM quality, Wi-Fi support
4. RAM (Memory)
For gaming in 2025, go for:
-
Recommended: 16–32GB DDR5 (6000MHz+)
5. Storage
Consider a fast SSD for load times.
-
Best Setup: 1TB NVMe SSD + optional 2TB HDD for files
6. Power Supply (PSU)
Choose a reliable PSU with proper wattage.
-
Recommended: 650W–850W, 80+ Gold certified
7. Case
Pick a case with good airflow, cable management, and space for future upgrades.
8. Cooling (Air or Liquid)
-
Budget: Tower air cooler
-
High-End: 240mm–360mm AIO liquid cooler Visit
Step-by-Step Guide to Building Your Gaming PC
1. Install the CPU
Open the socket, align the CPU correctly, and gently place it in. Avoid touching pins.
2. Install RAM
Insert RAM sticks into the motherboard’s recommended dual-channel slots.
3. Prepare the Case
Remove side panels, install case fans if needed, and adjust standoffs.
4. Install the Motherboard
Attach the I/O shield, then place the motherboard and screw it in.
5. Install Power Supply
Mount the PSU, route cables through cutouts for clean cable management.
6. Install the GPU
Insert the graphics card into the top PCIe x16 slot and secure it firmly.
7. Connect Cables
-
24-pin ATX
-
8-pin CPU
-
GPU power connectors
-
Front panel connectors (USB, audio, power switch)
8. Install Storage
Insert NVMe SSDs into M.2 slots or mount SATA drives.
9. Power On & Install OS
Enter BIOS, ensure components are detected, then install Windows/Linux.
Performance Tips & Optimization
1. Enable XMP/EXPO
This boosts RAM to its advertised speed.
2. Update GPU Drivers
Ensures maximum performance in new games.
3. Optimize Airflow
Follow front-to-back cooling patterns.
4. Use Game Mode & Hardware Scheduling
Improve responsiveness and FPS in competitive titles. Visit
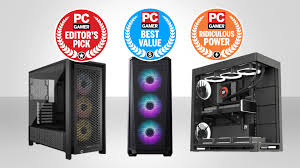
Recommended Gaming PC Builds (2025)
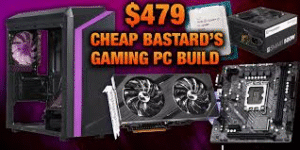
🔥 Budget 1080p Build (~$800)
-
Ryzen 5 CPU
-
RTX 4060
-
16GB DDR5 RAM
-
1TB NVMe SSD
⚡ 1440p Mid-Range Build (~$1500)
-
Intel i5 or Ryzen 7
-
RTX 4070 Super
-
32GB DDR5 RAM
-
1TB–2TB SSD
🚀 4K Ultra High-End Build (~$3000+)
-
Intel i9 / Ryzen 9
-
RTX 4090
-
64GB DDR5 RAM
-
2TB Gen 5 SSD
Final Thoughts
Building your own gaming PC gives you total control over performance, cooling, and aesthetics—while saving money and making upgrades easier. Whether you’re creating a budget-friendly setup or a 4K powerhouse, this Gaming PC Build Guide has everything you need to start your build with confidence. Visit Now